2009: 52 weeks of protective styles

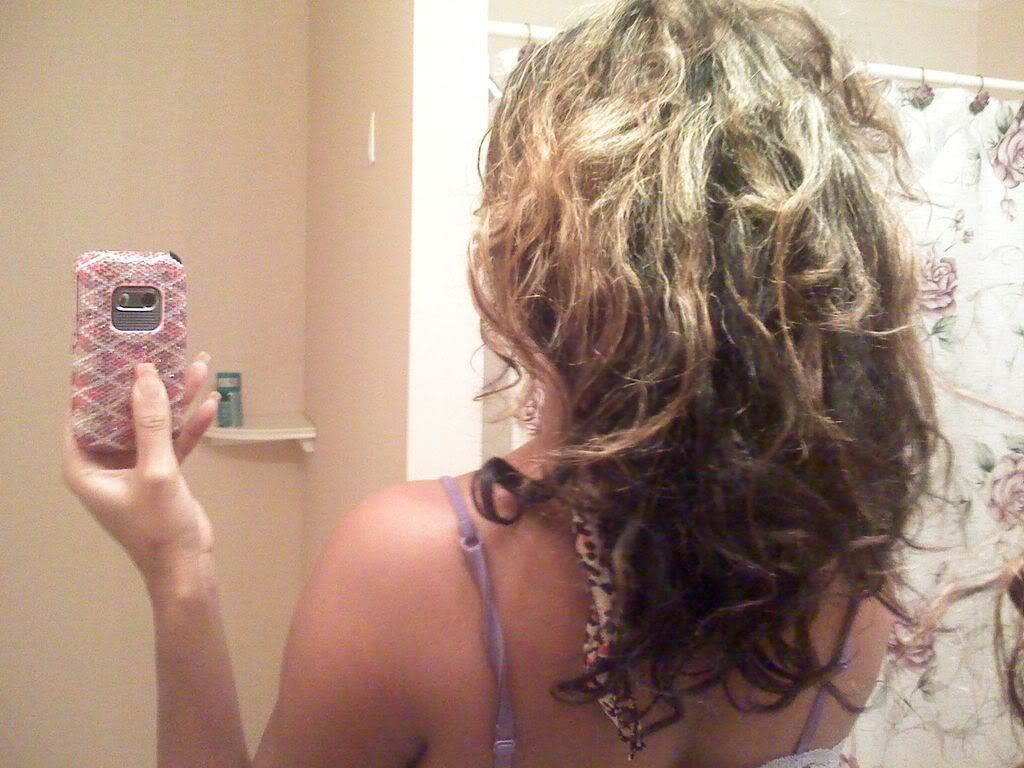
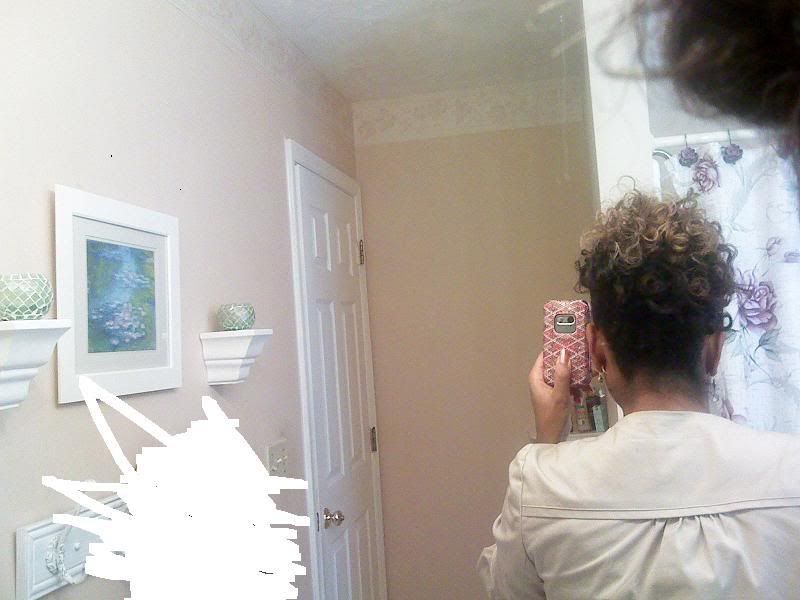
Faux Bob (BEFORE - old, frizzy rollerset hair):
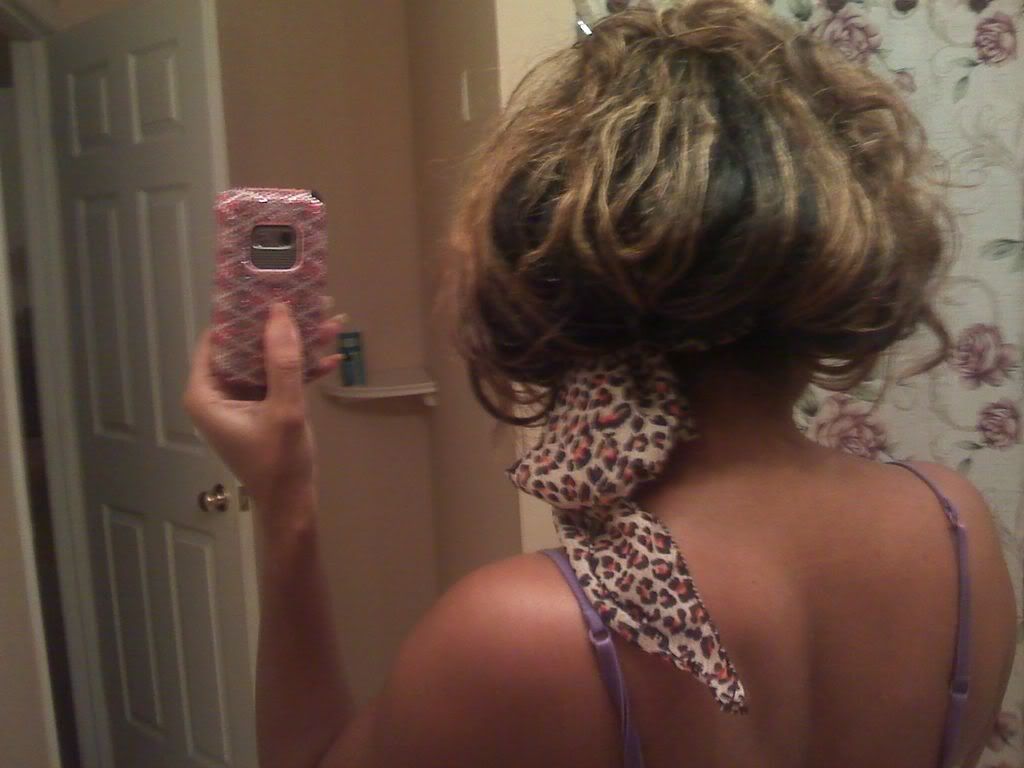
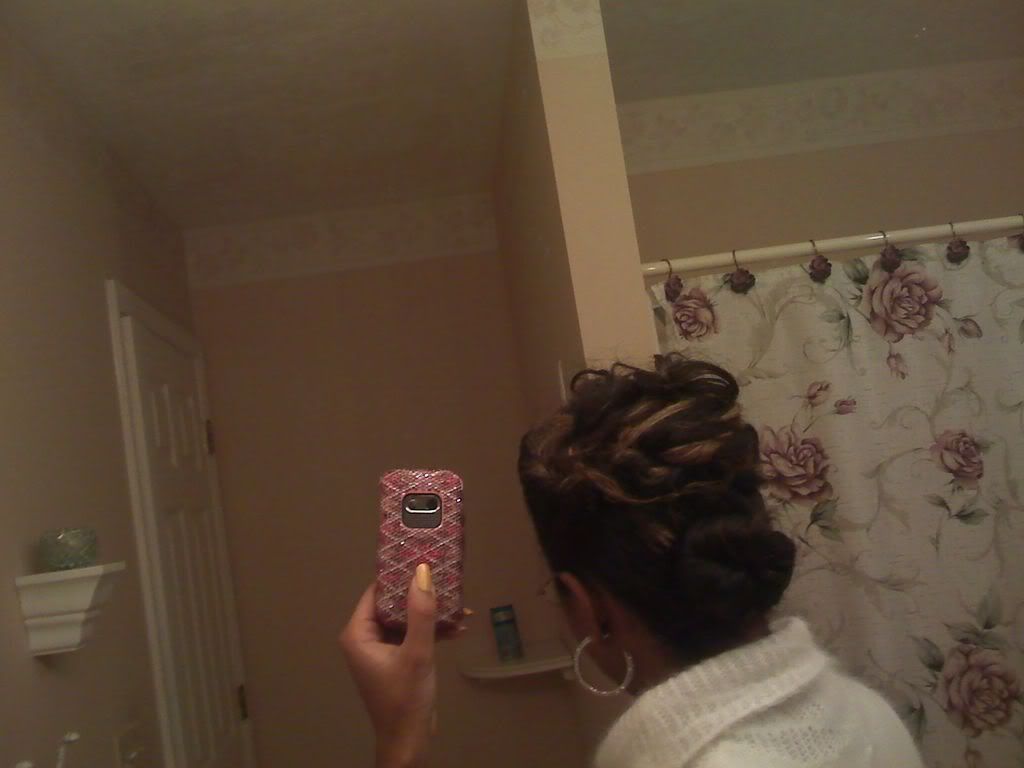
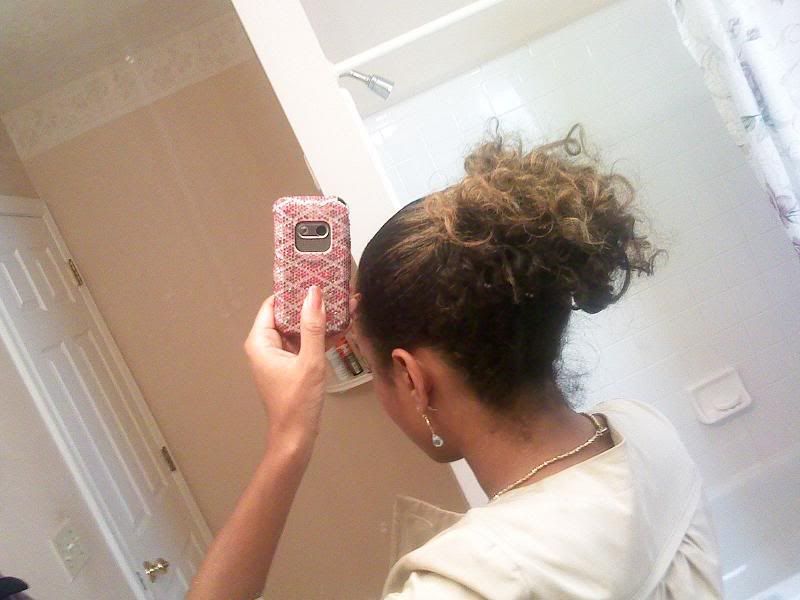

img446.jpg


AFTER:
img447.jpg


img448.jpg


img466.jpg

<off topic>
Your nails look so strong and healthy :yep:
 
Love the looks ladies.

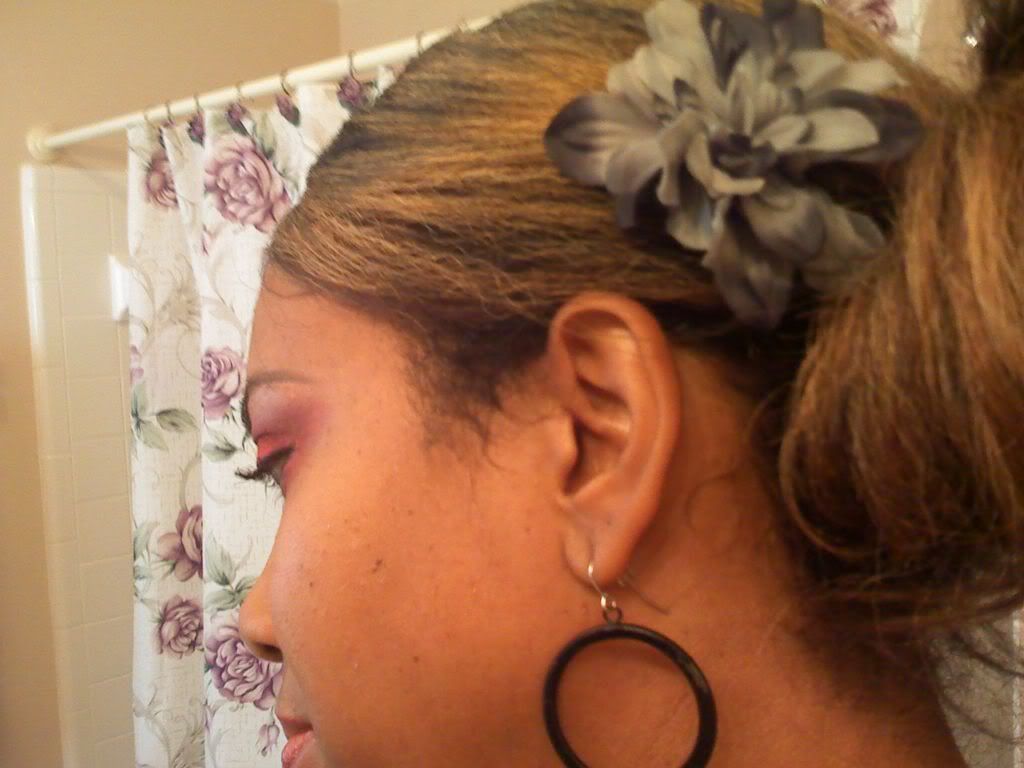
  • Civic4800......Your side bun is so darn pretty. I, like butterfly, can't find flowers that look pretty. Yours is a beautiful addition!
Go to a craft store, like Michael's. Buy the bulk artificial flowers that come on the stem. Clip the blooms you want. Glue them to a barrette, clip, etc, or just use the bendable stem and bobby pin them in your hair. I did this recently for NYE. The bulk silk/fake flowers are like 1.99 a stem. Michael's had three whole rows of flowers to choose from. The orchids I used came 7 to a stem for that price.
Very recessionista!
 
I LOVE this thread!! :) I'm trying to not relax until April :look: and need more updos to do...Here is mine, done Friday and will be worn until NEXT Friday...

All I did was get perm rod rollers, medium, make a side sweep one one side, slick the hair back on the other side (like gathering up in a ponytail) and curl tightly the rest of the hair in sporadic hand parted sections...Tied it down so it could be sleek and in the morning,took the curlers out...got 6 tiny octopus clips and made "chunky" flat twists in the front and two in the back to pin it up, like a ponytail..the hair that is now out and curled, I pinned under like a bun...Voila!! It helps SO much since I was getting breakage from attempting tight buns ALL the time...

I'll be watching this thread and borrowing a few ideas myself... :sekret: Keep posting ladies!!!
~*Janelle~*
 

Attachments

  • Updo week 1.jpg
    Updo week 1.jpg
    70.2 KB · Views: 67
My version of this updo...forgot to take pics from the front too:ohwell:

View attachment 25897

View attachment 25899

Cute. That looks very intricate. :yep:

[/list]Go to a craft store, like Michael's. Buy the bulk artificial flowers that come on the stem. Clip the blooms you want. Glue them to a barrette, clip, etc, or just use the bendable stem and bobby pin them in your hair. I did this recently for NYE. The bulk silk/fake flowers are like 1.99 a stem. Michael's had three whole rows of flowers to choose from. The orchids I used came 7 to a stem for that price.
Very recessionista!

Great idea and I love the term! I'mma have to use it! :look:
 
I LOVE this thread!! :) I'm trying to not relax until April :look: and need more updos to do...Here is mine, done Friday and will be worn until NEXT Friday...

All I did was get perm rod rollers, medium, make a side sweep one one side, slick the hair back on the other side (like gathering up in a ponytail) and curl tightly the rest of the hair in sporadic hand parted sections...Tied it down so it could be sleek and in the morning,took the curlers out...got 6 tiny octopus clips and made "chunky" flat twists in the front and two in the back to pin it up, like a ponytail..the hair that is now out and curled, I pinned under like a bun...Voila!! It helps SO much since I was getting breakage from attempting tight buns ALL the time...

I'll be watching this thread and borrowing a few ideas myself... :sekret: Keep posting ladies!!!
~*Janelle~*

I am loving this to death. I agree, the tight buns can cause breakage. I love how full this looks!!!! Ok, I gotta get back on the ball. :lachen: I have a double bun pic to post, which came out pretty good. Then next week I need to choose one of you guys' full looks. I'm feenin' some volume!
 
Please oh please let's add this to the repertoire...

This girl was at an event I was working and asked to take a picture of her hair cuz it was so cute.

bun2ji3.jpg


She said she wrapped her hair and pinned it in place.

The front was a band that she pinned in a very mini hump to the opposite side of the bun...added a nice bit of texture.

By adding hair, I think even those of us that don't have this length can do this style.

I saw this in your other thread. I am gonna have to try a sleeker side bun, I have only done the messy one. In order for me to get sleek styles I have to "prep it" the night before, meaning basically pull it into the bun and tie a scarf on it. I am 11.5 weeks post relaxer so I have to :whip: my ng to get it to lay down. :lol:
 
I actually saw this youtube video and had to post it here! Bow hair! How awesome :grin: It's pretty creative, but for people who have longer hair (BSL-MBL) maybe APL can pull it off?

http://www.youtube.com/watch?v=mYn23fg-bO4&feature=related

Its in Japanese. Its pretty self explanatory though but i'll do a quick translate.

First put the hair that you want to put in the ribbon in a hairtie
secondly, fluff out the hair and take a section of the hair thats only in the center of the hairtie. After that, take the hair thats left and leaving a little space, put it in another hairtie. you should make sure your hair is really smooth and brushed for people who want the bow to look really neat. Take the hair in between the two ties, split it into two, and create a shape of a ribbon. Here you can choose the size of your ribbon. If you want a large bow, take a larger section of hair, if you want a small bow, take a smaller section of the hair. AFter youv'e chosen how big of a bow you want to make, secure the hair with a bobby pin (lol i actually didn't know how to say this until this video, i'm learning too), in the direction of the hairtie straight into the foundation of the bow. After you've put in the pins, now to hide the rest of the hair inside the ribbon. Split the hair that is left into two, and (this part is kind of weird to translate, but i'm assuming they mean backcomb. Most people here would want to skip that step anyway.) Do this if you want the bow to have a lot of volume. If you don't want the ribbon to have that much volume, it might be better to skip the backcombing. Stand the hair up, and scrunch it so it becomes small, and hide it inside the ribbon. Once the hair is hidden, put a pin to secure it. Do the same to the opposite side. If you want your hair to be neat, secure the shape of the bow on the two sides with a hairclip. Now we will make the front of hte bow. Take the hair that you previously brought to the front and bring it all the way to the back, but first attach a pin so that it hides the hairtie. Once you've brought it to the back, attach another pin, and then you can hide it into either part of the ribbon as you choose. Since you've already put a pin there to secure it, you'll have to really roll the hair to make it small, and put it in beween the pins. You may put another pin inside to secure it again

Tada! I wish my hair was long enough to try this! maybe when I buy my LF hohoho.
 
I did it again lol

I did the two buns again. They won't stay in for long, I'm off to the Netherlands tomorrow so my sis can braid my hair:grin:.


(please don't pay any attention to how I sectioned my hair...seriously don't:sekret:)
 

Attachments

  • DSC01676.jpg
    DSC01676.jpg
    20.3 KB · Views: 28
I actually saw this youtube video and had to post it here! Bow hair! How awesome :grin: It's pretty creative, but for people who have longer hair (BSL-MBL) maybe APL can pull it off?

http://www.youtube.com/watch?v=mYn23fg-bO4&feature=related

Its in Japanese. Its pretty self explanatory though but i'll do a quick translate.

First put the hair that you want to put in the ribbon in a hairtie
secondly, fluff out the hair and take a section of the hair thats only in the center of the hairtie. After that, take the hair thats left and leaving a little space, put it in another hairtie. you should make sure your hair is really smooth and brushed for people who want the bow to look really neat. Take the hair in between the two ties, split it into two, and create a shape of a ribbon. Here you can choose the size of your ribbon. If you want a large bow, take a larger section of hair, if you want a small bow, take a smaller section of the hair. AFter youv'e chosen how big of a bow you want to make, secure the hair with a bobby pin (lol i actually didn't know how to say this until this video, i'm learning too), in the direction of the hairtie straight into the foundation of the bow. After you've put in the pins, now to hide the rest of the hair inside the ribbon. Split the hair that is left into two, and (this part is kind of weird to translate, but i'm assuming they mean backcomb. Most people here would want to skip that step anyway.) Do this if you want the bow to have a lot of volume. If you don't want the ribbon to have that much volume, it might be better to skip the backcombing. Stand the hair up, and scrunch it so it becomes small, and hide it inside the ribbon. Once the hair is hidden, put a pin to secure it. Do the same to the opposite side. If you want your hair to be neat, secure the shape of the bow on the two sides with a hairclip. Now we will make the front of hte bow. Take the hair that you previously brought to the front and bring it all the way to the back, but first attach a pin so that it hides the hairtie. Once you've brought it to the back, attach another pin, and then you can hide it into either part of the ribbon as you choose. Since you've already put a pin there to secure it, you'll have to really roll the hair to make it small, and put it in beween the pins. You may put another pin inside to secure it again

Tada! I wish my hair was long enough to try this! maybe when I buy my LF hohoho.

OMG, thats bow is adorable.

subscribing to this thread. this is genius!
 
Well, it's week 5 already!

Week 5: Doin' the TWIST

Here's your chance to pop in some flat twists - a lot or a little, your choice. Or maybe you will twist up your entire head.

Here's my interpretation. 2 flat :look: twists, curly ends pinned up, bun on the bottom....
img509.jpg

img508.jpg
 
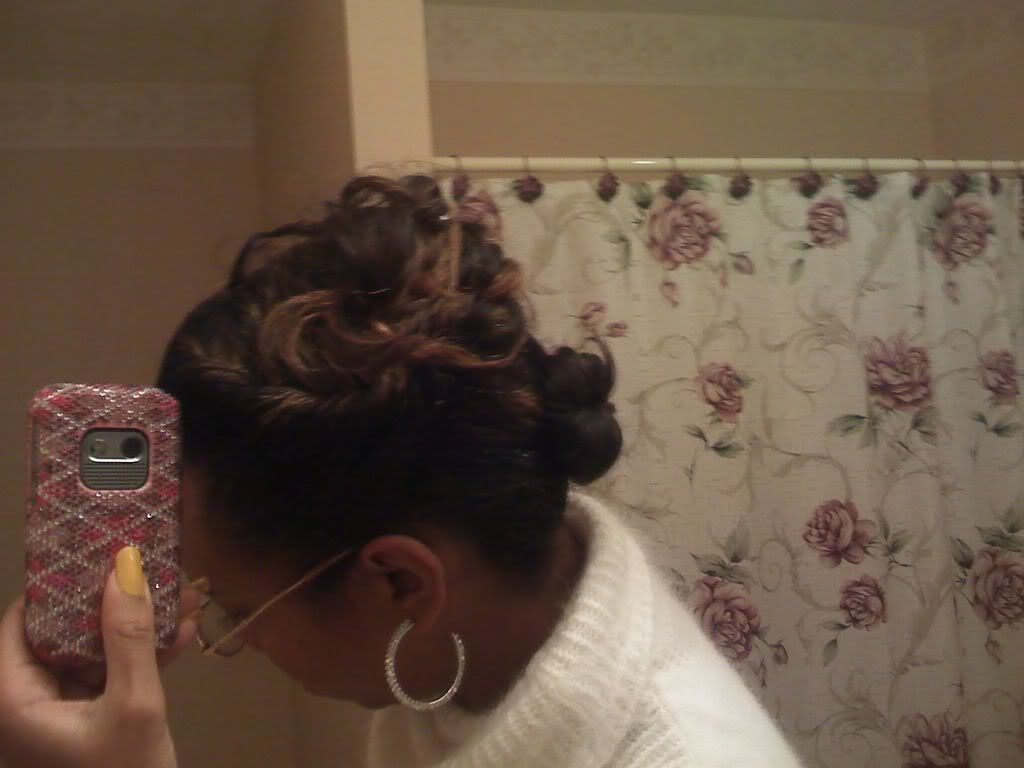
These are not that good, I'm really bad at protective styles but here is a contribution from last week:
 

Attachments

  • 100_0018.jpg
    100_0018.jpg
    82.3 KB · Views: 109
Last edited:
I know we're doing twists right now but I finally did a smooth side bun. I did a ponytail rollerset but it didn't dry all the way so I had a lot of poofy frizzy hair in the midde. The effect was as if I had teased it, so it came out pretty full.

img609.jpg

img607.jpg

img600.jpg

img594.jpg
 
OoO that's cute! How did you do that? What's holding your hair up?

Thanks
Two ponytails in the back one low the other one lower but not tight. then I twisted then swooped the bottom one and made it go up into the top one and just folded the top one over and kind of spread it out. I used the plastic holding clips instead of bobbie pins. I have to kindof hide my nape because it is jacked up so I try to stay low unless I have a really good gel for slicking. sorry about the dirty mirror. I have another from the back I will post tonite when I get home.
 
Got my hair braided:grin: I'm really happy, I'm gonna try to keep it for three months.

3248221090_c720b04b9e.jpg

That's so cute! I love the little side bun you have going on!

A couple of braids in the front look tight though, did it hurt? I am so tenderheaded, I still remember the braids I used to get as a child! :lachen: I used to act a mess! :lachen:
 
That's so cute! I love the little side bun you have going on!

A couple of braids in the front look tight though, did it hurt? I am so tenderheaded, I still remember the braids I used to get as a child! :lachen: I used to act a mess! :lachen:

I noticed that after looking at the pic too, they don't hurt though. My sister has gotten much better in that aspect, now that she has children (two girls, she braids their hair too):grin: cause back in the days:blush: I've never had problems with my hairline...hope it remains that way lol.
 
I'm so late with Week 6, but here it is, BANTU KNOTS!

I decided I liked mine best in a high bun. I will definitely be doing this again - I am 13.5 weeks post and have another 4 - 5 weeks to go! :blush:

img029.jpg

img023.jpg

img013.jpg
 
I've been lurkin from the start I'm currently in a full sew in until 3/1 I CANT WAIT 2 TAKE IT OUT!!! especially looking at all of these buns.. looking lovely & elegant LOVE IT!!!
 
Back
Top